Monday, August 11, 2014

Tamiya Madcap Number Three

This is the third Madcap I've rebuilt so far and it is also the second one of the batch of three I got earlier this year when I was on a Madcap shopping spree.  I call it Madcap #3.

Here is the car as I received it.  It came with an AM radio that was apparently modified to get power from an external battery pack (see wires).


Yeah, I know.  The wing decal is on backwards.  I didn't build it!


Damage was pretty standard issue as Madcaps go:  Rear chassis breakage/splitting around the gearbox mount (can't see it in the photos), a broken C3 rear gearbox mounting post (first time I'd seen that), but surprisingly no broken front chassis posts.  The motor was a stock Mabuchi RS540 with a broken wire tab that couldn't be repaired and it stunk like a piece of machinery that had been extremely hot at some point with that "hot oil" smell.  No visible damage, just smell.

I decided to install the optional metal motor plate in order to reduce flex caused by a (hopefully) more powerful motor and perhaps absorb a little bit of heat as well.  Ball bearings were used throughout, but I kept the stock gear set with a Robinson Racing 23T 0.6mod pinion and the standard 70T spur.  I figured I'd test whatever motor I chose with the standard ratio first and go from there.

I didn't take any pictures of the build, but it wasn't very eventful anyway since it was basically a standard stock build following the manual.  I used black CVA shocks again (50519 and 50520) like Madcap #2 since the performance is improved so much versus the stock friction shocks. 

The only interesting part of the build was the use of Avante aluminum posts as a drop-in replacement for the broken C3 gearbox mounting post.  I'd heard they could be used on the forums, so I bought a bag of parts from eBay to test the theory.  Each bag comes with three posts and a bunch of other junk, so two bags will refit three cars.  It turns out that the parts are exactly the same dimensions as C3.  Just the standard self tapping screws have to be swapped out for 3mm machine threaded ones and that's it.


Now for the motor choice. I wanted something with a bit more power and speed.  I have a small selection of motors that I purchased from others over the years, almost all well used.  Many of these motors are standard 27T stock variants which means the performance is fairly known and predictable within a certain range, which is to say rather boring.  But a few of the motors have an unknown number of turns on the armature, so it is fun to try them out to see what they are capable of.  The Demon Power motor that I used in Madcap #2 was one of the "unknown winds" that unfortunately turned out to be rather disappointing once I ran it, so this time I was determined to find a motor that had more power.  After looking at the various choices in my collection, I decided to use a Fantom motor with seemingly no other identifiable markings.  I did not even power it up to test before installation to see how fast it spun.  I mean, all of the used motors in my collection have been disassembled (if it is possible), cleaned and oiled before being put away, so I knew the Fantom was in good working condition, but I did not remember how fast it was when powered by the 4 AA pack that I use for motor testing.  Basically I was blind to what the motor was capable of.  It could be another slowpoke like the Demon Power or it could be a real powerhouse.  I figured it would be fun to find out and compare.  I forgot to take a picture of the motor by itself, so here it is fully installed with the label partially hidden by a heatsink.


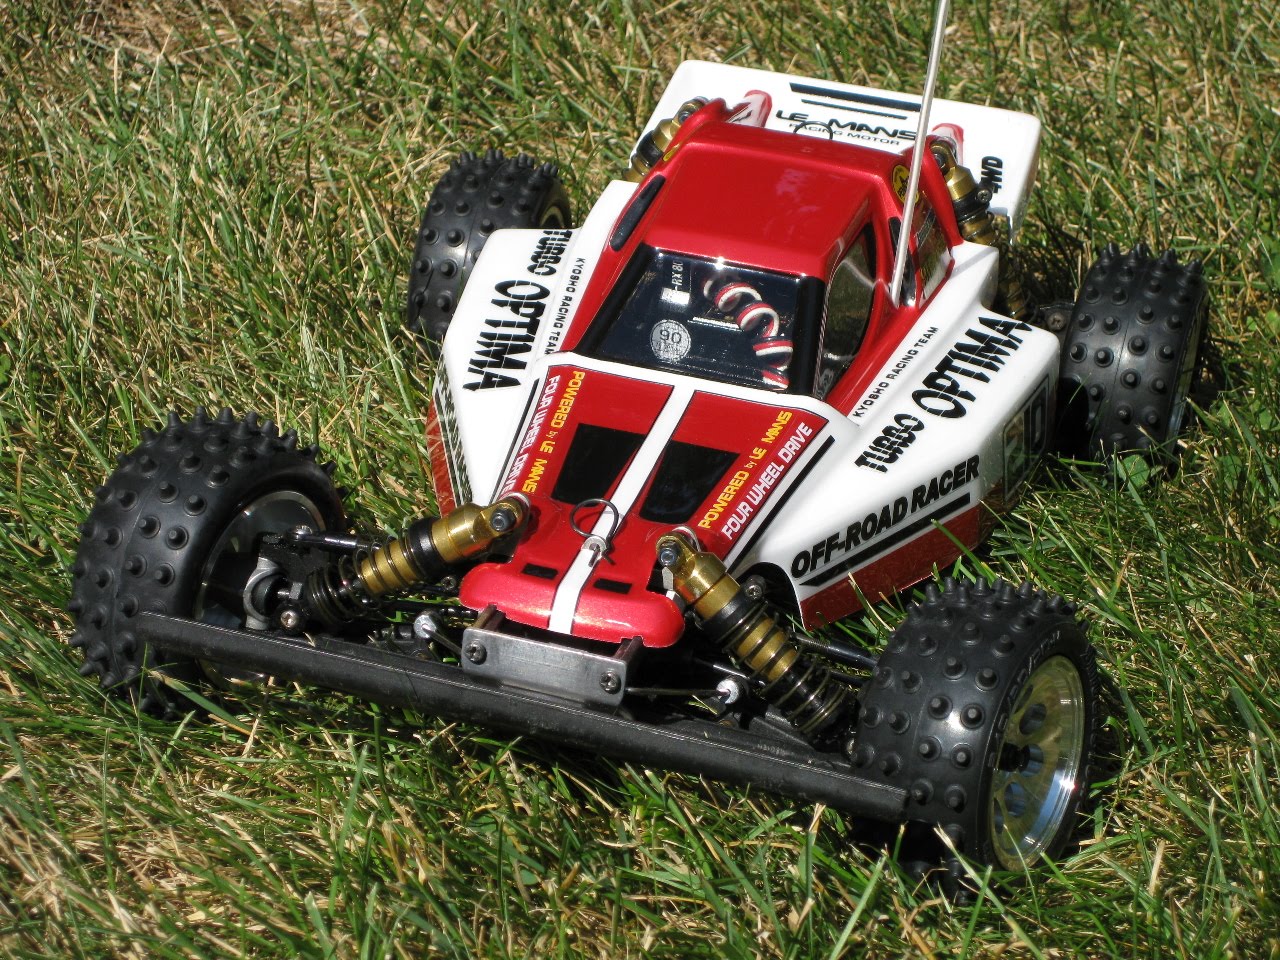
Here are some more pictures of the finished chassis and original body.  The body actually cleaned up a little and got a bit whiter which was nice.  There is paint missing from a bunch of spots, but it is still usable.  The wheels and tires are from Carson Motor Sport in the UK.  The chrome rims are bright, but I think they go with the body color well enough.


I used a Futaba S28 servo for steering along with a G to J conversion cable to connect it to a Futaba R113ip receiver.  The speed control is a Futaba MC330CR.

Performance
With the stock 23T / 70T gearing and the Fantom motor, this car was a rocket ship!  Massive power and incredible speed.  In fact, it was almost too much speed.   It was hard to hit full throttle without running out of pavement.  Not only that, but just letting the car coast felt like the brakes were on because the motor magnets were so powerful.  After a few minutes of driving, I touched my finger to the motor can to feel how hot it was and I could tell that I needed to gear it down or I'd damage the motor.  I swapped the 70T spur gear for the 77T and also switched out the 23T pinion for a 21T pinion (the largest that could fit given the motor mounting screw slot size on the metal motor mounting plate).  This changed the pinion/spur ratio from 1:3.04 to 1:3.67.   The new ratio definitely reduced the heat output of the motor, but I felt that it needed one less tooth on the pinion, so I replaced the 21T with a 20T.  This changed the gear ratio to 1:3.85 and resulted in great motor temperatures while still providing incredible speed and amazing power.  I added a black vertical finned heatsink to help dissipate heat and I believe it does help a little.  Getting the heat to transfer through the motor label via a clip-on heatsink is not ideal, but I think it's worth it.  

Launching the car from a standstill or a slow forward roll results in the back end sinking down to help get more traction thanks to the black oil filled CVA shocks and their smooth movement.   Conversely, hitting the brakes actually lifts the rear end and drops the front down a bit.  The power provided by the Fantom motor is quite amazing considering it is a well-used example that might be over 15 years old and it's being powered by NiCd batteries that are probably close to 10 years old.  If I had to guess, I'd say the Fantom is a 9T or something simply because it is so fast and powerful. 

Given all of that power, I know what you're thinking.  The poor Madcap ball diff cannot possibly stand up to such a powerful motor without disintegrating.  Maybe this is true, maybe it isn't.  All I can say is that the diff has not even given me a whimper through over 8 battery packs of running.  No squealing, no loss of power, just great power delivery and the awesome whine of the Madcap gearbox.  I also purposely do not thrash on any of my cars and try to deliver smooth power commands.  Also, since I'm not really doing much off-roading or jumps, drivetrain shock is minimal.  I did use the optional shims when building the diff because they certainly do help.  I know because when I first built the diff without the shims and tested the car, it squealed a bit under high acceleration.  I added the shims and it's been great ever since.  I should mention that I used Tamiya ball diff grease, not just any old grease when rebuilding the diff.  Ball diff grease is specially designed to not let the balls slip whereas other greases would allow slippage.  This is a key thing to remember.  Also, I made sure all diff parts were thoroughly clean before rebuilding it.  All parts went into a motor cleaner bath until everything was clean and then the rebuild was started.  All it takes is a single grain of grit or sand and the diff can be ruined.

Of the three Madcaps I've rebuilt so far, this is my favorite one to run.  But I still have one more Madcap rebuild left, so stay tuned!

Monday, August 4, 2014

Love the Tamiya Madcap

I really do.  It's a great car.  I missed it when it was originally released in 1989 because I was just starting college and had no money for RC.  It isn't a particularly spectacular car and certainly has some weaknesses, but it's fun to drive and work on.  

My first introduction to the Tamiya Madcap chassis was actually a Saint Dragon that I bought on eBay.  The chassis was too nice to use as a runner since it was never really completely finished by the original owner, so I decided to purchase a Madcap to use as a runner.  Even though the chassis was well-used, it was in good enough condition to warrant purchasing a reproduction body and original decals.

After restoring the first Madcap, I wanted more.  I wanted to try the chassis with different motors to see how it behaved.  I wanted to try some Thorp hop-ups such as the 48P gear conversion kit including the Thorp ball differential.

At the beginning of this year I bought three well-used Madcaps to go along with my box art restoration runner and give me choices of which to run.  This is the first one of the three, and I call it Madcap #2. 

The below pictures show the dis-assembly sequence.


Major damage was limited to one of the posts that holds the top front brace.  These posts are molded into the chassis tub itself and are long and thin, making them susceptible to cracking and damage.  This one broke midway up the post.  You can see the broken post still attached to the brace.


None of the Madcaps I've bought so far have had ball bearings.  Back in 1989, ball bearings were still a luxury for most people, so plastic bearings reigned supreme.

A Reedy ES motor was mounted.  The wind is unknown.  The gray substance to the left of the motor is the foam cover that has disintegrated into dust particles.

The ball differential, another of the Madcap's weaknesses, was in good condition.  Wear was minimal.


I cleaned all of the metal parts using motor cleaner.  The plastic parts were washed in the sink with hot water, dishwashing liquid and an old toothbrush.  After the parts completely dried, the chassis was rebuilt by following the Madcap manual.  Ball bearings were used throughout, and the stock blue friction shocks were replaced with black CVA shocks (50519 and 50520).  The stock soft aluminum 23T pinion was replaced with a Robinson Racing #1123 steel 23T metric (0.6mod) pinion.  The Robinson Racing 11xx series of pinions are highly recommended for 0.6mod purposes due to their high quality machining and strength.

Rebuilding the chassis was uneventful except for the front brace posts.  Attempting to glue the broken front chassis post would never work because it is simply too thin to offer any strength.  In the past I have tried CA glue and epoxy, but the joint never withstands the strain of screwing down the front brace or ultimately gives way while driving.  A very strong repair is available, however, if you are careful.  The post can be completely removed all the way down flush with the bottom of the chassis tub. The length of the original molded-in post is 25mm.  RC4WD sells aluminum links in varying lengths, including 25mm anodized in black.  These links are internally threaded to accept a 3mm machine screw on both ends.  Once the post has been removed and the plastic webbing brace structure cleared, the 25mm aluminum link can be mounted in its place.  This provides a very strong mounting point for the front brace.  Use 3mm washers with the screws on the bottom in order to widen the screw's contact area with the chassis and provide a strong foundation for the post.  I removed both plastic molded-in posts from this chassis and replaced them with the aluminum RC4WD links.  It is very stealth.  Only the space between the plastic ribbing and the post give it away.


A package shot of the RC4WD 25mm black anodized aluminum link with 3mm internal threads (part #Z-S0880).

For the motor, rather than use the Reedy, I decided to install a well-used "Demon Power" brushed motor with reflective red label.  I had gotten it as part of a used motor lot a few years ago.  I figured I'd give it a try to see if it earned its name.  As it turned out, it was not very impressive.  Maybe the magnets are weak due to abuse it received before it came into my possession but I think it barely has more power than a stock RS540 motor and certainly doesn't spin any faster.  I'll keep it in this chassis until it dies or I get bored with it.


Here is Madcap #2 finished. For radio gear, I used an old S28 servo with G to J conversion for steering (it still works perfectly, so why not?), a Futaba MC230CR ESC and a Futaba R113ip 75MHz receiver. 


The wing has seen better days for sure.  It's been reduced to just a curved flat surface by the original owner.


I am using the original body for now because it is in OK shape and is functional even if it isn't concours-worthy.


The wheels and tires are made by Carson Model Sport in the UK.  They are great for 2WD buggies that use ball bearings in the front wheels instead of hex mounts.  The tread design gives good traction and the wear is decent.  I always balance the rear tires to reduce vibration and improve smoothness.


Monday, July 28, 2014

Kyosho Scorpion 2014

Kyosho has finally decided to enter the re-release arena with an absolutely spectacular first result.

The Scorpion 2014

Image Copyright © Kyosho Corporation

Many hobby enthusiasts figured Kyosho would stay away from re-releases simply because the company has always done things a little bit differently compared to others.  They've always been more race-oriented and focused on the next design, never looking back.  In fact, some informal discussions with Kyosho representatives with customers and fans as recently as a year ago had basically confirmed that Kyosho was not interested in re-releases at all and had no plans to make any.   While disappointing to some, it seemed to fit in with what was known about the company's ideals and philosophy and as a result it did not create much discussion on the internet forums.  Everyone just accepted that Kyosho was not going to re-release any models because that was not what they were about.

But then, earlier this year, Kyosho's 50th anniversary celebration began and with it a new slogan "No Borders!!!".  The below image is a link to a 106 page book.  If you have not seen it, please take the time to check it out.  It is a great read.

Image Copyright © Kyosho Corporation
Kyosho spent a lot of time and money to create the 50th anniversary "No Borders!!!" campaign, so clearly they understand how important their history is and how many fans they have around the world.  Kyosho is very proud of their history as a hobby company and their many accomplishments as they rightly should be.

Unlike some other industries, the hobby industry is very good at keeping secrets, so there was no early warning that Kyosho might be working on a re-release of any kind, let alone the original Scorpion from 1982.  When the news broke a few months ago, it swept through the RC world quickly with much excitement and anticipation.  The high-quality pictures of the re-released model dispelled any question about how it would look.  It is a true re-release, very much like how Tamiya re-released the Avante 2011 and Bruiser 2012:  The basic design and aesthetics are the same as the original, but improvements have been made in many areas to improve durability, remove shortcomings and keep up with modern technology. 

It appears that most parts of the Scorpion 2014, including the front and rear arms, gearbox and radio tub are all recreations of the original design rather than from the original molds.  If anything, this proves without a doubt that Kyosho is not afraid to spend time and money making re-release models. All of the parts are well made and high quality.  Kyosho really did everything right when making this re-release.

The quality of the kit and parts is extremely good.  The machining and tolerances are excellent and the kit is an absolute joy to put together according to most everyone that has built one so far.  Comparisons to the Team Associated re-release of the original RC10 Classic were made in various forums and most builders agreed that the Scorpion 2014 kit was less fiddly with fewer problems than the re-released RC10 Classic.

The most popular complaints were about the shocks.  Lacking bladders just like the originals, they are time-consuming to build and "get right" because of the need to bleed the oil through the threaded cap while compressing the piston and tightening the cap to seal the shock.  The thin, clear plastic seals are also a source of problems.  In fact, a set of front shocks I purchased separately to use on a Kyosho Raider rebuild I am working on was missing one of those seals.  Thankfully, the shock with the missing seal has not started leaking yet.   

Recommendation to Kyosho:  Redesign the shocks to use a different seal or supply one extra seal with each shock kit.  They are easy to lose and a pain to install. And finally, sell the seals by themselves, please (8 to a package or something).

Another problem some builders have experienced is binding of the dogbones after rear-end assembly.  The most popular recommendations are to loosen the gearbox and ensure it is exactly 90° to the chassis and loosen the rear arm mounts and push the arms forward (as if to create more toe-in of the rear axles) and then tighten everything up.  The binding should go away.

All in all, the problems have been very minor and everyone has been pleased with how the kit went together and how it looks.


Did I forget to mention that the kit has blister packaging?  Oh yes, it does!  The yellow radio tub and lexan body float in the center section.

It is not known if the lexan body is made from the original mold or a new one.  There are no marks or flashing because Kyosho removed the excess material during manufacturing.

The radio tub is definitely a new design and not from the original mold.  The original tub was textured on the outside while the new one is smooth.  The basic shape is the same, however there are new holes and modifications of old holes that are part of the "modernization" process each kit piece went through.  The steering servo mounts should be better than relying on servo tape in the long term - a nice enhancement to the original tub for sure.

The battery compartment has been designed to hold most modern batteries.  The approximate dimensions are 144mm x 52mm x 28mm (LxWxH).


Not shown here, but the rear arms are machined after molding where the ball bearings are installed.  It must add to the cost of production, but is a much better practice than relying on metal molds for bearing alignment and dimensional accuracy like the original arms did.  Unlike the original Scorpion's solid final gear (no differential), the 2014 version's kit-supplied differential is gear-based.  The optional Ultima SC ball diff (UMW602) can be swapped in if desired.

The shocks are assembled for display purposes, but not filled with oil yet.


All gears are 48P and full ball bearings are supplied with the kit.  No bushings here.  A slipper is now included as well. 

The tires have the Goodyear logo silkscreened on them at the factory.

Not really a whole lot of parts make up the kit.  Just six main parts bags and spare parts bag plus the parts contained in the blisters.


Kyosho even went a step further by making a bunch of optional parts and hop-ups available, including the already-mentioned ball differential (UMW602), LED lighting kit, alternative wheel finishes (polished chrome, black chrome), radio tubs in red and black and more.  Some parts are available now while others are still in development.

The Scorpion 2014 (30613B) is a re-release done right.  Here's to hoping that some form of Optima re-release is next on Kyosho's agenda.